
UHMW-PE Melting Point and Its Impact on Machining: A Complete Guide for Engineers and Machinists
Introduction
Ask any machinist who has worked extensively with plastics what separates a successful UHMW-PE part from a scrapped one, and they will almost certainly point to heat. The melting point of UHMW-PE is not just a number on a datasheet—it is the single most critical factor determining whether you get clean chips, tight tolerances, and a stable finished product, or a gummy, burred, dimensionally unpredictable mess.
Ultra-high molecular weight polyethylene (UHMW-PE) sits at the top of the polyethylene family, defined by molecular chains that are ten to twenty times longer than standard HDPE. This gives it extraordinary wear resistance, impact strength, and a low friction coefficient that makes it valuable in conveyors, guides, wear strips, sliding pads, and heavy industrial equipment. But those same long chains are thermally sensitive. When Machining UHMW-PE, the heat generated at the cutting edge can approach its melting point in milliseconds—long before you ever see smoke or obvious deformation.
The problem is not that UHMW-PE is difficult to machine in the same way that, say, PEEK or PTFE can be. It's that its thermal properties are poorly understood. Many shops use generic plastic-cutting parameters, dull tooling, or no coolant, and then wonder why the part is riddled with melted smears, why the tool is gummed up after three passes, or why a "finished" component has moved 0.5 mm by the next morning.
In this guide, I'll walk you through the science behind the UHMW-PE melting point, exactly how it creates machining challenges, and the practical engineering controls that help this material machine more reliably. Whether you're designing a wear strip, a star wheel, or another sliding component, understanding this one property can reduce delays, rework, and rejected parts.
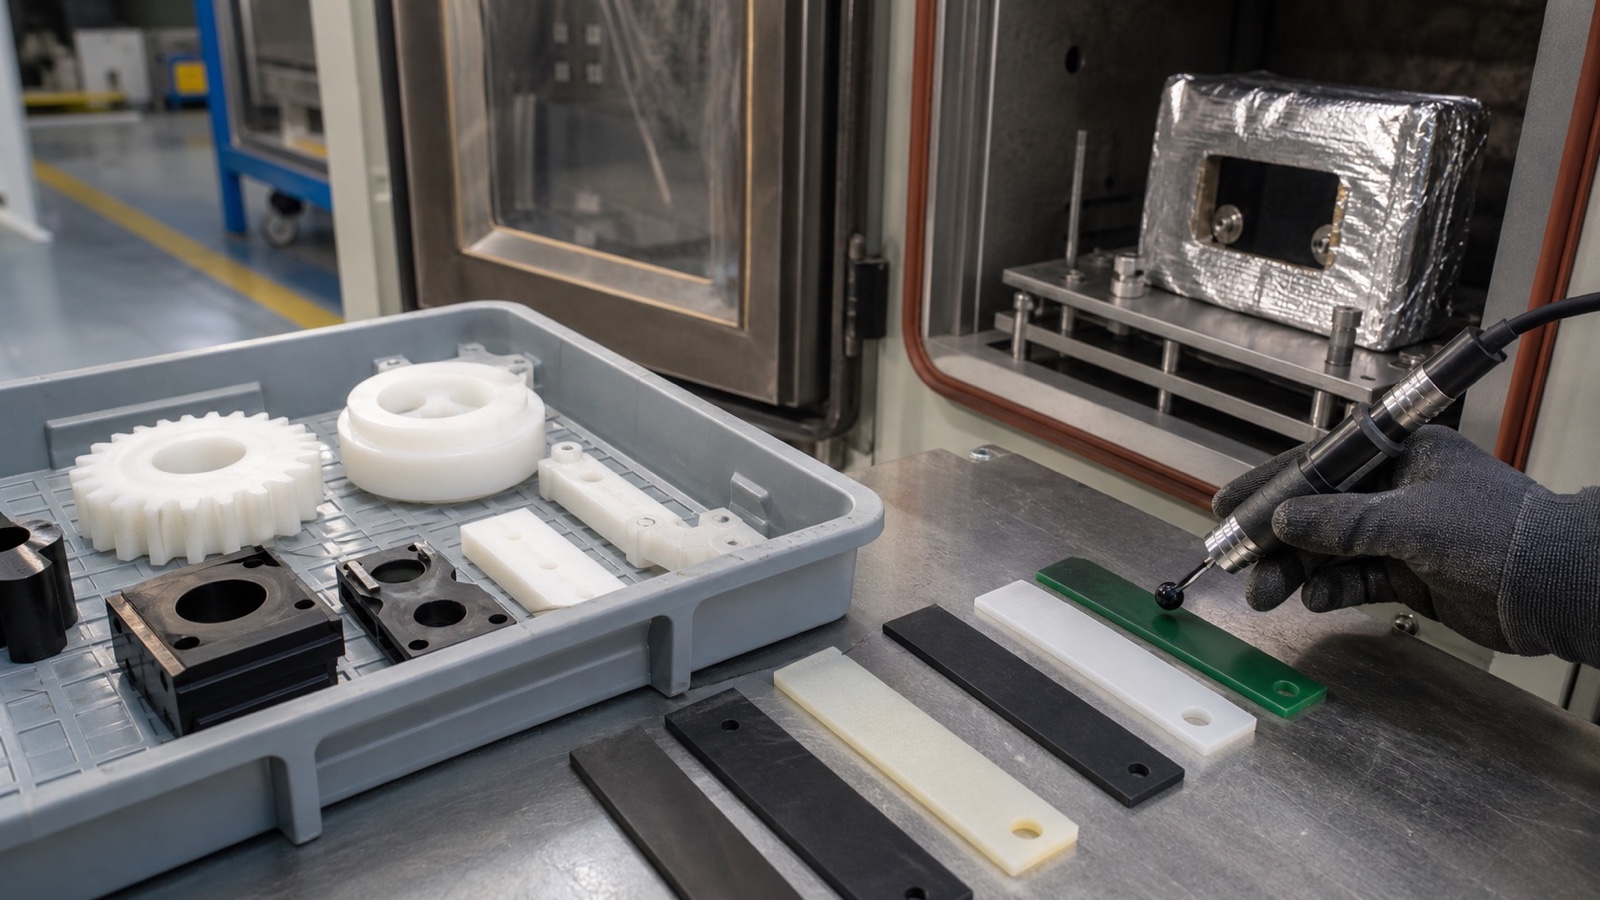
Key Takeaways
- UHMW-PE has a relatively low melting point of approximately 130–136°C (266–277°F), far below most engineering metals and many other thermoplastics.
- This low melting point directly affects chip formation, tool gumming, thermal expansion, and dimensional tolerances during machining.
- Sharp tooling, low spindle speeds, higher feed rates, and effective cooling are non-negotiable for successful UHMW-PE machining.
- Annealing UHMW-PE at 80–100°C before machining relieves internal stresses and reduces post-machining dimensional drift.
- UHMW-PE cannot be effectively laser cut—the heat melts, chars, and degrades the polymer, producing toxic fumes.
What Is UHMW-PE? A Material Overview
Defining Ultra-High Molecular Weight Polyethylene
UHMW-PE is a subset of polyethylene with molecular weights typically ranging from 3 to 10 million g/mol. Standard high-density polyethylene (HDPE) has molecular weights of around 200,000–500,000 g/mol. That difference is not incremental; it's transformative. The extraordinarily long polymer chains entangle and interlock, creating a material that doesn't simply soften or creep the way HDPE does. Instead, UHMW-PE exhibits:
- Outstanding abrasion resistance — often outperforming steel in sliding wear applications.
- Very high impact strength, even at cryogenic temperatures.
- A low coefficient of friction, comparable to PTFE but with far better mechanical rigidity.
- Excellent chemical resistance and negligible moisture absorption.
These properties are directly linked to molecular weight, which is why UHMW-PE occupies a unique niche among engineering plastics. But the same long chains that give it strength also make it thermally sensitive, which brings us to the central theme of this article.
Key Physical and Mechanical Properties at a Glance
Here's a quick reference table for the most relevant properties when machining UHMW-PE:
| Property | Typical Value |
|---|---|
| Density | 0.93–0.94 g/cm³ |
| Tensile Strength | 20–45 MPa (depending on grade and direction) |
| Elongation at Break | 300–450% |
| Impact Strength (Izod, notched) | No break (very high) |
| Coefficient of Friction | 0.10–0.20 (against steel) |
| Melting Point | 130–136°C (266–277°F) |
| Continuous Service Temperature | 80–90°C (176–194°F) |
| Coefficient of Thermal Expansion | 120–200 × 10⁻⁶ /°C |
| Water Absorption | < 0.01% (24 hours) |
The properties that make UHMW-PE great—wear resistance, low friction, impact toughness—all stem from its long molecular chains. However, those same chains are held together by relatively weak Van der Waals forces. The crystalline regions of the polymer melt at a modest temperature, and once you add frictional heat from machining, you are operating very close to the edge of material failure.
The Thermal Vulnerability of UHMW-PE
It's important to understand that "melting point" for UHMW-PE is somewhat misleading. Like most semi-crystalline polymers, UHMW-PE doesn't have a sharp, water-ice-like melting transition. It softens progressively as heat increases. At around 80°C, the material begins to lose stiffness. At 100–120°C, it becomes noticeably compliant. By 130–136°C, the crystalline regions transition to an amorphous flow state—what we colloquially call melting.
The structure is a mix of crystalline lamellae and amorphous regions. The crystals provide stiffness and wear resistance; the amorphous regions offer flexibility and impact toughness. When machining, localized frictional heat can melt the amorphous regions first, even if the bulk part remains cool. This micro-melting at the cutting edge is what leads to smearing, burring, and the stringy, gummy chips that are the signature of poor UHMW-PE machining.
The Science Behind the UHMW-PE Melting Point
Why UHMW-PE Melts at a Relatively Low Temperature
The melting point of a polymer is governed by its chemical structure and the degree of crystallinity. Polyethylene is a simple, flexible molecule—a straight chain of carbon atoms with hydrogen side groups. These chains pack easily into crystals, but the forces holding them together are weak dispersion forces. Compare this to other engineering plastics:
- HDPE: ~130°C — similar to UHMW-PE because it has the same chemistry.
- Nylon (PA6/PA66): ~220–260°C — hydrogen bonding between chains raises the melt temperature.
- Acetal (POM): ~165°C — slight polarity and rigid backbone increase thermal resistance.
- PTFE: ~327°C — the strong carbon-fluorine bond and helical chain structure give it an exceptionally high melting point.
For UHMW-PE, the melting point is actually essentially the same as HDPE because the chemical repeat unit is identical. The difference is molecular weight, which affects melt viscosity rather than melting temperature. Ultra-long chains don't melt at a higher temperature—they just become extremely viscous and rubbery when they do melt. That's why chips of UHMW-PE don't become a free-flowing liquid; they become a sticky, elastic mess that clings to tools and smears across the workpiece.
Melting Point vs. Continuous Service Temperature
Here's a critical distinction that many engineers miss: the peak melting point (130–136°C) is not the recommended operating temperature. For continuous service, UHMW-PE should generally be limited to 80–90°C. Beyond that, the material loses mechanical integrity, begins to deform under load, and may experience accelerated surface wear.
This matters enormously for machining. The temperature at the cutting interface—the point where the tool meets the workpiece—can independently rise well above the bulk part temperature. Friction, plastic deformation, and chip shearing all generate heat in a very small zone. It is entirely possible for this localized zone to reach 130°C or more even if the part as a whole feels only mildly warm to the touch. Once that happens, you've effectively created micro-melting at the cutting edge, and the consequences are immediate.
How Heat Affects the Molecular Structure During Machining
When the cutting tool engages UHMW-PE, the polymer ahead of the tool undergoes severe plastic deformation. In a well-managed cut, this produces a clean, continuous chip that carries heat away. But if speeds are too high or the tool is dull, the deformation becomes inefficient, generating excessive frictional heat. This heat causes the polymer chains in the shear zone to disentangle and flow, which is precisely what we observe as micro-melting.
The consequences are threefold:
- Smearing and burring: Melted polymer is pushed against the freshly cut surface, creating fuzzy edges and raised burrs.
- Tool gumming: The sticky, semi-molten polymer adheres to the cutting edge, changing the tool's geometry and generating even more friction.
- Recrystallization: When the melted polymer cools, it may recrystallize in a different morphological state, leaving behind a surface with altered hardness, friction, and appearance. The original fabricated sheet may have had a specific crystalline structure, and localized melting replaces it with a disturbed skin layer that can also hold internal stresses.
In short, heat doesn't just make the part ugly—it compromises the material's integrity at the surface.
How Melting Point Creates Machining Challenges
The Thermal Expansion Problem
UHMW-PE has a coefficient of thermal expansion (CTE) of approximately 120–200 × 10⁻⁶ /°C—roughly ten to twenty times that of steel. This means a 100 mm part that heats up by just 10°C can expand by 0.12 to 0.20 mm. For a tolerance of ±0.05 mm, that's a disaster.
Machining generates heat in the cutting zone, which conducts into the part. Unless you have excellent cooling and a stable ambient temperature, the work piece may be significantly warmer during machining than it will be at inspection time or in service. The part can literally shrink after you machine it, causing a nominally correct feature to fall out of tolerance.
This effect is especially pronounced in thin-walled parts or large flat panels. The solution isn't just to measure more carefully—it's to control heat generation in the first place and to allow parts to stabilize before final measurement.
Chip Formation and Tool Gumming
Anyone who has machined UHMW-PE remembers the first time they saw a long, sticky, stringy ribbon wrap around the tool. It's fascinating, and then it's infuriating. The combination of high ductility and low melting point means that UHMW-PE tends to form continuous, gummy chips that are difficult to break. If the chip wraps around the cutter, it can get caught between the tool and the workpiece, generating friction and heat.
Once a tool gums up, a vicious cycle begins:
- Gummed tool edges have a larger, more complex cutting geometry.
- The increased contact area creates more friction.
- More friction produces more heat.
- More heat softens more polymer.
- More soft polymer sticks to the tool.
This cycle can escalate until the cutting edge is completely clogged, the surface finish degrades, and the part may even halt the machine. The key is to prevent gumming in the first place with sharp, polished tools and appropriate cutting parameters, and to use chip-breaking strategies where possible.
Viscoelastic Memory and Dimensional Drift
UHMW-PE is a viscoelastic material. It has both viscous (flow-like) and elastic (spring-like) behavior. During manufacture—whether the stock was compression-molded, ram-extruded, or skived from an annealed block—internal stresses can become locked into the polymer. When machining removes material, it also relieves those stresses, causing the part to distort.
Heat accelerates stress relief. If a part is machined at a slightly elevated temperature (say, 40–50°C from cutting friction), the molecular chains have more mobility and can rearrange. Once the part cools, it may adopt a new equilibrium shape that is different from what it was immediately after machining. This is why measuring a UHMW-PE part right off the machine is unreliable. It's common to see dimensions change by several tenths of a millimeter overnight, especially on long, thin, or asymmetrical parts.
Annealing before machining—or at least allowing a stress-relief soak at 80–100°C—can mitigate this, as we'll discuss later.
Workholding and Tolerance Challenges
UHMW-PE is soft relative to metals. Standard metal clamping pressures will easily deform it, especially on thin cross-sections. If clamping pressure is too low, however, the part can vibrate or shift during cutting, leading to chatter and localized heat buildup. It's a delicate balance.
One common mistake is to clamp directly on an unsupported section. The material flexes under the cutter, producing inconsistent depths, torn surfaces, and heat concentration at the flexible point. Thin-walled parts are particularly vulnerable: they heat quickly, expand unevenly, and then warp when released from the fixture. Successful UHMW-PE machining requires workholding that distributes pressure broadly and supports the part over its entire length.
Best Practices for Machining UHMW-PE Without Crossing the Melting Point
For UHMW-PE machining, the goal is to control heat, avoid rubbing, and keep the part stable through roughing, finishing, and inspection. Here are practical starting principles to discuss with your machining supplier.
Tooling Selection
The first rule: never use a dull tool on UHMW-PE. A sharp edge is the single most important factor in minimizing frictional heat. We recommend:
- Carbide or PCD tooling: Carbide stays sharp longer than HSS in abrasive environments. PCD (polycrystalline diamond) is excellent for long production runs.
- Polished flutes and faces: Polished surfaces reduce material adhesion. A mirror-finish rake face allows chips to slide away rather than stick.
- High rake angles: Positive rake angles (typically 10–20°) shear the material cleanly instead of pushing it. This reduces cutting forces and heat.
- Large clearance angles: Clearance of 10–15° prevents the tool flank from rubbing against the freshly cut polymer surface, which would otherwise generate frictional heat.
Avoid inserts designed for metals—they typically have negative rake geometry, which is terrible for UHMW-PE. Use tooling designed specifically for plastics, or at minimum, ground positive-geometry tools.
Speeds, Feeds, and Depth of Cut
The natural instinct when machining plastics is to increase speed for a better finish. With UHMW-PE, that's exactly backwards. High spindle speeds create friction faster than heat can be carried away. The right approach is:
- Moderate surface speed: 150–300 m/min for carbide tools. This is roughly equivalent to 500–1000 SFM. For HSS, reduce to 70–150 m/min.
- Higher feed rate: Use 0.1–0.3 mm/rev (0.004–0.012 in/rev). A higher feed keeps the tool cutting new material rather than dwelling in the same area.
- Shallow axial depth of cut: Typically 0.5–3 mm, depending on rigidity. Deep cuts can trap the chip and generate localized heat.
- Keep the tool moving: Avoid dwell or interrupted cuts. Any time the tool is in stationary contact, heat builds up.
The general rule is to produce thick, manageable chips that can carry heat away, rather than thin, powdery "dust" that holds heat and creates friction. If you see long stringy chips, you are likely at the higher speed range; increase feed or reduce speed slightly.
Cooling and Chip Evacuation
Cooling is not optional. Even with sharp tooling and moderate parameters, friction will raise the temperature of the cutting zone. Use:
- Air blast: A high-volume compressed air stream removes heat and clears chips. This is often sufficient for light finishing cuts.
- Water-soluble coolant: For deeper cuts or production machining, a flood or mist coolant is better. It also prevents chip re-welding to the cut surface.
- Vacuum chip evacuation: Long, stringy chips can quickly fill the cutting area. A vacuum system removes them cleanly and prevents them from tangling around the cutter.
Always position nozzles so that coolant or air hits the cutting edge directly, not upstream of the tool. The goal is to remove heat at the source.
Workholding and Fixturing
- Vacuum tables: Ideal for flat panels and thin sheets. The uniform pressure prevents flexing and provides excellent support.
- Soft jaws: For machining blocks, use soft aluminum or plastic jaws that contour to the part. Avoid hard, serrated jaws that can gouge UHMW-PE.
- Full support: Ensure the work is supported as close to the cutting zone as possible on thin sections. Use sacrificial backing plates or support strips to prevent deflection.
- Light but firm clamping: Clamp with enough force to prevent movement, but not so much that you crush the material. UHMW-PE can deform permanently under excessive pressure.
On thin-walled parts, consider machining in multiple setups: rough the part, let it stress-relieve in the fixture, then finish with lighter cuts and a lower feed rate.
Pre-Machining Annealing
If a UHMW-PE part requires tighter dimensional control, especially after substantial material removal, pre-machining stress relief may be worth discussing with the material supplier. A typical supplier-recommended approach may include:
- Heat the UHMW-PE stock plate or block in an oven to 80–100°C (176–212°F).
- Soak for a duration proportional to thickness (typically 1 hour per 25 mm, plus one hour).
- Cool slowly in the oven, or between insulated plates, at a rate of no more than 10°C per hour until below 50°C.
This process allows the polymer chains to relax and eliminates most internal stresses from the original forming process. Annealed stock will machine with significantly less dimensional drift after tooling.
Caveat: heat treatment can change how UHMW-PE cuts, and poor temperature control may create new dimensional problems. Use supplier guidance for the exact grade and verify the result with sample parts before committing production work.
Operation-Specific Techniques for UHMW-PE
Drilling UHMW-PE
Drilling is where most beginners melt UHMW-PE. The drill stays in contact, chips cannot escape, and heat builds up rapidly inside the hole. My advice:
- Use standard HSS twist drills with polished flutes, or better, a drill with a sharp 90° point angle and low rake (0–5°). This reduces the tendency to "pull" into the material.
- Peck drill in increments of 2–3× the diameter. Retract to clear chips. Do this regularly, especially for deeper holes.
- Use coolant or air mist down the hole. The most important place for cooling is the cutting lips, not the exterior of the drill.
- For holes deeper than 3× diameter, consider a specialized "chip breaker" drill or a stub drill that is less prone to flexing.
- Back the workpiece with a sacrificial plate to prevent breakout and burrs on the exit side.
Milling UHMW-PE
Milling produces interrupted cuts, which helps manage heat compared to drilling. But the cutter geometry must be right:
- Climb milling is preferred. Conventional milling can rub and smear, producing a poor finish and more heat. Climb cutting shears the material cleanly and pushes chips away.
- Use single-flute or two-flute cutters with high positive rake and large relief angles. A single-flute cutter gives the chip maximum room to evacuate.
- Avoid up-cutting on the top edge of the part if you want a crisp edge; climb milling will pull the cutter into the material and produce a cleaner edge.
- For slotting, consider a thinner cutter with a higher flute angle (e.g. 25–35° helix) to channel chips out of the slot.
- Use a chip fan or vacuum to remove the long chips before they wrap around the tool holder.
Turning UHMW-PE
Turning is a continuous cut, so chips are often stringy. To control them:
- Use a tool with a high positive rake (10–20°) and a large clearance angle (10–15°).
- Set the tool exactly on center height. If the tool is below center, it will rub against the material, creating heat.
- Use a lead angle (approach angle) of 45–55° to produce thinner, more controllable chips.
- Light cuts are better than heavy cuts. A finishing cut of 0.5–1 mm at a feed of 0.1–0.2 mm/rev produces a smooth surface with minimum heat.
- Break the chip using a chip breaker or a small depth-of-cut step. Without this, the continuous ribbon can wrap around the chuck or tool post.
Sawing and Blanking
Cutting UHMW-PE sheets can be done by sawing or routing:
- Use a fine-tooth blade with a moderate hook angle (5–10°) and adequate set to prevent the kerf from closing and creating friction.
- For horizontal bandsaws, a blade with 4–6 teeth per inch is typical. For circular saws, a carbide-tipped blade with 10–20 teeth is effective.
- Keep blade speed moderate and feed pressure consistent. Do not force the cut—that creates friction.
- For high-volume blanks, consider water jet or CNC routing. Water jet is ideal for cutting UHMW-PE without any heat-affected zone, and it produces excellent edge quality.
Laser Cutting UHMW-PE—Why It's a Bad Idea
I'll state this plainly: laser cutting UHMW-PE is a mistake. The laser doesn't cut the polymer—it heats it to melting and vaporization. Because UHMW-PE has a low melting point and a high viscosity in the molten state, the laser creates:
- A large heat-affected zone with melted, re-solidified edges.
- Charring and discoloration where the polymer begins to degrade.
- Toxic fumes (carbon monoxide, aldehydes, and other combustion products) that require expensive extraction systems.
Even with a supposedly "clean" CO2 laser setup, the edge quality on UHMW-PE is far inferior to water jet or CNC routing. Do not use laser cutting for UHMW-PE if you need dimensional accuracy or a clean edge.
Ranking of cutting methods by edge quality for UHMW-PE:
- Water jet — best edge, no heat-affected zone.
- CNC routing — excellent edge with proper tooling.
- Fine sawing — acceptable edge, may require deburring.
UHMW-PE vs. Other Machinable Plastics
Many engineers ask me how UHMW-PE compares to other common machining plastics. Here's a quick breakdown.
UHMW-PE vs. HDPE
The melting points are nearly identical, but the molecular structure is different. HDPE has shorter chains and is more brittle under impact. UHMW-PE is tougher, has better stress-crack resistance, and offers much lower wear rates. When machining, UHMW-PE requires more aggressive rake angles and sharper tooling because its higher toughness makes it more prone to smearing.
UHMW-PE vs. Nylon
Nylon has a significantly higher melting point (220–260°C), which allows faster machining speeds and more aggressive cutting. However, nylon absorbs moisture, which can cause dimensional changes during and after machining. UHMW-PE absorbs almost no water and is dimensionally stable in humid environments. For wear parts, UHMW-PE is generally the better choice; for parts requiring stiffness or a high melting point, nylon wins.
UHMW-PE vs. Acetal (POM)
Acetal is stiffer, more rigid, and more dimensionally stable than UHMW-PE, with a higher melting point (~165°C). Acetal machines extremely cleanly, producing well-broken chips and excellent surface finishes. UHMW-PE is softer and more forgiving in impact but requires more careful heat management. If you need a low-cost polymer with tighter dimensional stability, acetal is usually easier; if you need high wear resistance and low friction, UHMW-PE may be the better fit when heat control is planned from the start.
UHMW-PE vs. PTFE
PTFE has a much higher melting point (~327°C), but it is soft, gummy, and notoriously difficult to hold to tight tolerances. It deforms under cutting forces and tends to "fuzz" on machined edges. UHMW-PE is more rigid, easier to dimension, and offers superior abrasion resistance. Both have low friction, but UHMW-PE is the better choice for machined components where dimensional accuracy is critical.
Practical Applications and Grade Selection for Machined UHMW-PE Parts
Common UHMW-PE Grades and Their Machining Implications
When you purchase machined UHMW-PE parts, the grade you choose affects both performance and machinability.
- Standard natural grade: White, FDA-compliant in many cases, general-purpose. Easy to machine with the practices above.
- Black grade (often with carbon black): UV-stabilized for outdoor use. Carbon black can slightly increase abrasive wear on tools, so carbide tooling is essential.
- UV-stabilized: Similar to standard, but with additives that reduce UV degradation. Machinability remains good.
- Food-grade: Usually same as natural, but with stricter compliance. No significant machining difference.
- Specialty regulated grades: Some UHMW-PE grades are supplied for applications with additional cleanliness, traceability, or documentation requirements. Confirm the material specification and compliance requirements before machining or sourcing parts.
- Antistatic / conductive grades: Filled with carbon or other conductive additives. These are more abrasive to tools, so reduce speed and use carbide or PCD tooling.
Additives generally do not change the melting point significantly, but they do change thermal conductivity and friction behavior. You should always adjust parameters based on the exact formulation.
Industrial Applications
UHMW-PE is everywhere in heavy industry:
- Wear strips on conveyors, chutes, and hoppers.
- Chain guides and rack guides on packaging lines.
- Star wheels for bottle and can handling.
- Conveyor components like scrapers, rollers, and bearings.
- Impact-resistant linings for bulk material handling.
Because UHMW-PE is often used in sliding contact, thermal expansion must be designed for. A wear strip that is 2 meters long can expand by several millimeters over a temperature range of 50°C. If it's bolted down rigidly, it can buckle. We recommend mounting with oversized holes and slotted fasteners to allow free movement, or cutting the material into shorter segments with expansion gaps. When machining these parts, keep tolerances realistic and always specify the service temperature range so that the design accounts for thermal movement.
Precision and Regulated Applications
Some UHMW-PE parts are used in demanding assemblies where wear behavior, cleanliness, traceability, or dimensional stability matter. In these cases, buyers should define the material grade, surface expectations, inspection method, and service temperature before quoting the part.
The key lesson for industrial machinists: if UHMW-PE overheats during cutting, the surface structure can change. Even in non-medical parts, that can reduce wear life and create inconsistent dimensions.
Frequently Asked Questions
What is the exact melting point of UHMW-PE?
The standard melting range is 130–136°C (266–277°F). However, UHMW-PE begins to soften and lose mechanical strength well below this—typically around 80°C for continuous use. During machining, localized temperatures can reach the melting range even if the bulk part stays cool.
Is UHMW-PE hard to machine?
It's deceptively simple and sometimes tricky. UHMW-PE is soft and forgiving in terms of cutting forces, but it demands excellent heat control, sharp tooling, and proper chip evacuation. If you respect its thermal limits, it machines predictably; if you ignore them, it turns into a gummy, melted mess.
How do I prevent UHMW-PE from melting during machining?
Use sharp carbide or PCD tooling with positive rake and high clearance angles. Run moderate spindle speeds and higher feed rates. Use air blast or water-soluble coolant. Keep chips evacuated and never dwell in one spot. Consider stress-relieved stock or supplier-guided annealing when dimensional stability is critical.
Can UHMW-PE be laser cut?
Not recommended. Laser cutting heats UHMW-PE to melting, causing charring, toxic fumes, and a poor edge. Use water jet, CNC routing, or fine sawing instead.
What tolerances can be achieved when machining UHMW-PE?
Tolerance depends on part geometry, feature size, stock condition, temperature stability, and inspection method. UHMW-PE can be held to practical engineering tolerances, but it is not as dimensionally stable as acetal, PEEK, or metals. Always define critical features, allow parts to stabilize to room temperature before inspection, and confirm feasibility against the drawing.
Is annealing really necessary for UHMW-PE?
For non-critical parts, often no. For parts requiring tighter dimensional stability, long-term flatness, or heavy material removal, supplier-guided stress relief may help. The trade-off is an extra processing step and potentially altered cutting behavior.
Conclusion
UHMW-PE is one of the most versatile engineering plastics available—if you understand its thermal limits. The melting point of 130–136°C is not just a datasheet value; it's a boundary that dictates every decision in the machining process. From tool geometry and spindle speed to coolant selection and workholding, everything comes down to one goal: keep the material below its softening point at the cutting zone.
At PlasticCNCPro, UHMW-PE machining is approached as a material-specific engineering task, not as generic plastic cutting. The principles shared here reflect the way experienced plastic machining teams control heat, tool sharpness, workholding, and inspection planning for practical prototype and low-volume production work.
If you're designing a part with UHMW-PE, or if you've been struggling with melting, gumming, and dimensional drift, you don't have to solve it alone. Reach out to us with your drawing, 3D model, or even just a concept. We'll review the material selection, recommend machining parameters, and provide a detailed quotation. Whether you need a prototype, a low-volume batch, or repeat production, we're ready to help you get it right the first time.
Contact PlasticCNCPro today with your project requirements, and let us put our plastic machining expertise to work for you. Send your 2D drawing, 3D file, material specification, and quantity to our team, and we'll get back to you with a clear quotation and production recommendation.
RFQ Support
Send Your Drawing for a Quote
Share your 2D drawing, 3D model, material, quantity, tolerance, surface finish, and application details. Our team will review manufacturability and reply with a practical quotation.
Email: info@plasticcncpro.com
Address: 29 Fuxing Road, Dongguan City, Guangdong Province, China